
TECHNOLOGY
Common Features to Look for in an Electric Tester

Electric testers are indispensable tools for anyone working with electrical systems, from homeowners and DIY enthusiasts to professional electricians. These devices help ensure safety, diagnose electrical issues, and verify the proper functioning of circuits, outlets, and appliances.
Choosing the right electric tester can be daunting, given the variety of models and features available on the market. Understanding the common features to look for in an electric tester is crucial for selecting one that fits your needs.
This article explores the key features to consider when purchasing an electric tester, ensuring safety, reliability, and efficiency in your electrical testing tasks.
1. Type of Electric Tester
Before diving into features, it’s essential to determine the type of electric tester you need. Common types include:
- Voltage Testers: For checking if a circuit or wire is live.
- Continuity Testers: To determine if a circuit is complete.
- Multimeters: Versatile devices that measure voltage, current, and resistance.
- Clamp Meters: Ideal for measuring current without disconnecting the circuit.
- Socket Testers: Designed for testing electrical outlets.
Choosing the right type depends on the nature of your work and the specific applications you handle.
2. Voltage Range
The voltage range of an electric tester determines the types of systems it can handle. A wide voltage range allows for greater versatility.
- For home use, a tester with a range of 100-240V AC is typically sufficient.
- For industrial applications, look for testers capable of measuring up to 600V or more.
Ensure the tester can handle the maximum voltage of the systems you intend to test.
3. Measurement Accuracy
Accuracy is critical, especially for professional electricians and technicians. A reliable electric tester provides precise readings without significant error margins.
- Look for testers with a low percentage of error (e.g., ±1%).
- Digital testers often provide more accurate readings than analog ones.
High accuracy is essential when diagnosing sensitive equipment or troubleshooting complex systems.
4. Safety Ratings
Safety is paramount when working with electrical systems. Ensure the tester adheres to recognized safety standards:
- CAT Ratings: Check for a Category (CAT) rating appropriate for your use case:
- CAT I: For low-energy devices like electronics.
- CAT II: For household appliances and plug-in devices.
- CAT III: For distribution circuits and industrial equipment.
- CAT IV: For high-energy industrial and utility installations.
- Overvoltage Protection: Ensures the tester can handle voltage spikes without damage.
- Insulated Probes: Prevents accidental contact with live circuits.
Always choose a tester with a safety rating higher than or equal to the system you’ll be working on.
5. Display Type
The display type affects how easily you can read measurements:
- Analog Displays: Use a needle to indicate values; preferred for monitoring fluctuating readings.
- Digital Displays: Provide clear, precise numeric readings; ideal for most modern applications.
- Backlit Screens: Essential for low-light environments, such as basements or outdoor work at night.
A well-lit, easy-to-read display minimizes errors and enhances usability.
6. Durability and Build Quality
Electric testers often endure rough handling, exposure to dust, and occasional drops. Look for features that enhance durability:
- Rugged Casing: Protects against physical damage.
- Water and Dust Resistance: Ensures reliability in harsh environments.
- Shockproof Design: Helps the tester withstand accidental falls.
Invest in a tester with a robust build to avoid frequent replacements.
7. Ease of Use
User-friendly features make electric testers more convenient, especially for beginners:
- Auto-ranging: Automatically selects the correct range for measurements, reducing the need for manual adjustments.
- Single-Hand Operation: Allows for ease of use in tight spaces.
- Clear Indicators: LED lights, beeps, or vibrations to indicate live circuits or faults.
Simpler interfaces and intuitive designs save time and reduce the learning curve.
8. Portability
For electricians and field technicians, portability is a key consideration:
- Compact Size: Lightweight and small testers are easier to carry.
- Built-in Storage: Compartments for probes or wires can enhance convenience.
- Carrying Case: Protects the tester during transport.
Portable testers improve mobility and make on-site work more efficient.
9. Additional Testing Functions
Modern electric testers often include extra features that increase their versatility:
- Continuity Testing: Verifies if a circuit is complete.
- Resistance Measurement: Checks for issues like broken wires or poor connections.
- Capacitance and Frequency Measurement: Useful for specialized applications.
- Non-contact Voltage Detection (NCV): Allows for safe, contactless detection of live wires.
These additional functions make a tester more versatile and valuable.
10. Battery Life and Power Source
Electric testers powered by batteries should have a long battery life for extended use. Look for features such as:
- Low Battery Indicators: Alerts you when it’s time to replace the battery.
- Auto Power-Off: Conserves battery life by turning off the device when not in use.
For high-frequency use, consider testers that support rechargeable batteries.
11. Brand and Warranty
Choose electric testers from reputable brands known for quality and reliability. Popular manufacturers include Fluke, Klein Tools, and Amprobe. Check for:
- Warranty Coverage: A good warranty indicates the manufacturer’s confidence in their product.
- Customer Support: Reliable support ensures assistance when needed.
Avoid unknown brands with no reviews or support.
Take the time to assess your requirements and compare options to make an informed choice. A good electric tester is an essential tool that pays off in enhanced safety and successful projects.
Introduction
If you’ve ever used Quizizz for teaching or training, you’ve probably wondered about the quizizz time limit and how it affects performance. Time settings can shape how students engage, think, and respond. Set it too short, and learners feel rushed. Set it too long, and focus may drop.
In this guide, you’ll learn exactly how the Quizizz time limit works, how to adjust it effectively, and how to use it strategically to improve learning outcomes. Whether you’re a teacher, trainer, or course creator, mastering this feature can make a big difference.
What Is Quizizz Time Limit?
The Quizizz time limit refers to the amount of time allowed for each question or the entire quiz. It controls pacing and influences how participants interact with the content.
Key Points:
- Time can be set per question
- It impacts scoring and engagement
- It can be adjusted depending on difficulty level
- It helps maintain focus and discipline
Quick Definition (Featured Snippet Ready)
Quizizz time limit is the duration assigned to answer each question or complete a quiz, designed to control pacing and enhance engagement.
Types of Time Limits in Quizizz
Understanding the different types of time settings helps you design better quizzes.
1. Per-Question Time Limit
Each question has a fixed time (e.g., 30 seconds).
2. Overall Quiz Timer
A total time limit for the entire quiz session.
3. No Time Limit Mode
Participants can answer at their own pace.
Comparison of Time Limit Types
| Time Setting Type | Best Use Case | Benefits | Drawbacks |
|---|---|---|---|
| Per-Question Timer | Fast-paced quizzes | Keeps students focused | Can stress slower learners |
| Overall Quiz Timer | Exams and assessments | Encourages time management | Harder to control pacing |
| No Time Limit | Practice or homework | Reduces pressure | May reduce engagement |
How to Set Time Limits in Quizizz
Setting the time limit is straightforward but requires thoughtful planning.
Step-by-Step Guide:
- Create or open a quiz
- Edit a question
- Locate the timer option
- Select time (5 seconds to several minutes)
- Save changes
Pro Tip:
Start with moderate timing (30–60 seconds) and adjust based on student feedback.
Why Time Limits Matter in Learning
Time constraints are more than just a setting—they shape behavior.
Benefits of Using Time Limits:
- Improves focus and attention
- Encourages quick thinking
- Prevents distractions
- Simulates real exam conditions
However…
Too much pressure can lead to:
- Anxiety
- Guessing instead of thinking
- Reduced comprehension
Ideal Time Limit Based on Question Type
Different questions require different timing.
Recommended Timing Framework
| Question Type | Recommended Time | Reasoning |
|---|---|---|
| Multiple Choice (Easy) | 15–30 seconds | Quick recall |
| Multiple Choice (Hard) | 45–90 seconds | Requires analysis |
| True/False | 10–20 seconds | Simple decision-making |
| Open-ended | 1–3 minutes | Requires explanation |
| Image-based | 30–60 seconds | Needs visual interpretation |
Best Practices for Setting Quizizz Time Limits
1. Match Time with Difficulty
Harder questions need more thinking time.
2. Consider Your Audience
Younger students or beginners may need extra time.
3. Use Practice Mode First
Test timing before using it in real assessments.
4. Avoid Extreme Limits
Too short or too long can reduce effectiveness.
5. Monitor Performance Data
Adjust timing based on quiz results.
Practical Example
Let’s say you’re creating a science quiz:
- Easy questions: 20 seconds
- Medium questions: 45 seconds
- Hard questions: 75 seconds
This variation keeps the quiz balanced and fair.
Pros and Cons of Using Time Limits
Pros:
- Boosts engagement
- Encourages fast thinking
- Maintains quiz flow
- Simulates real exams
Cons:
- Can increase stress
- May disadvantage slower learners
- Encourages guessing if too strict
Common Mistakes to Avoid
1. Setting the Same Time for All Questions
Not all questions are equal.
2. Ignoring Student Feedback
Learners often reveal timing issues.
3. Overusing Tight Deadlines
This can reduce learning quality.
4. Not Testing the Quiz First
Always preview your quiz.
Advanced Strategies to Optimize Quizizz Time Limit
Use Adaptive Timing
Adjust time based on difficulty levels.
Combine with Power-Ups
Gamify the experience without over-relying on speed.
Analyze Reports
Quizizz provides performance data—use it.
Strategy Breakdown Table
| Strategy | How It Works | Outcome |
|---|---|---|
| Adaptive Timing | Vary time per question | Better fairness |
| Practice Mode First | Test before live quiz | Reduced errors |
| Data Analysis | Review quiz reports | Continuous improvement |
| Balanced Pressure | Moderate time constraints | Higher engagement |
When Should You Remove Time Limits?
There are situations where removing time limits is beneficial.
Use No Time Limit When:
- Teaching new concepts
- Supporting special needs learners
- Running homework assignments
- Encouraging deep thinking
Quizizz Time Limit for Different Use Cases
Classroom Learning
Moderate timing works best.
Competitive Quizzes
Short time limits increase excitement.
Exams
Use structured timing similar to real tests.
Best Practices Summary
- Keep timing flexible
- Align with difficulty
- Test before publishing
- Use feedback loops
- Avoid unnecessary pressure
Conclusion
The quizizz time limit is more than just a timer—it’s a powerful tool that shapes how learners interact with content. When used correctly, it improves focus, engagement, and performance. However, it requires thoughtful planning and constant adjustment.
By balancing challenge with fairness, you can create quizzes that are both effective and enjoyable. Start experimenting with different timing strategies, and you’ll quickly see the difference.
FAQs
1. What is the maximum time limit in Quizizz?
Quizizz allows several minutes per question, depending on settings, but exact limits may vary.
2. Can I remove the time limit in Quizizz?
Yes, you can choose a no-time-limit mode for self-paced learning.
3. Does time affect scoring in Quizizz?
Yes, faster correct answers often earn more points.
4. What is the best time limit for quizzes?
It depends on difficulty, but 30–60 seconds is common for most questions.
5. Can students pause the timer?
No, once the quiz starts, the timer runs continuously.
Continue Reading on Wilddiscs
Introduction
If you’re searching for jynx qr code ultra moon, you’re likely trying to unlock this iconic Ice/Psychic Pokémon quickly and efficiently. Fortunately, Pokémon Ultra Moon makes it easier than ever through the QR Scanner feature.
Instead of spending hours hunting in the wild, you can simply scan a QR code and register Jynx in your Pokédex—unlocking its location in seconds. But there’s more to it than just scanning.
In this guide, you’ll learn exactly how QR codes work, where to find Jynx afterward, and how to maximize your Island Scan rewards.
What Is the Jynx QR Code in Ultra Moon?
The Jynx QR code in Ultra Moon is a scannable code that allows players to register Jynx in their Pokédex instantly. Once registered, you can locate it using the Island Scan feature.
How QR Codes Work
- Open your Rotom Dex
- Select the QR Scanner
- Scan a valid Pokémon QR code
- Add the Pokémon to your Pokédex
- Build points toward Island Scan
Each scan gives you 10 points, and once you reach 100 points, you unlock Island Scan.
How to Use Jynx QR Code Ultra Moon
Step-by-Step Process
- Open your menu and launch the QR Scanner
- Scan the Jynx QR code
- Confirm Pokédex registration
- Continue scanning until you reach 100 points
- Activate Island Scan
- Travel to the correct island and location
Quick Breakdown Table
| Step | Action | Result |
|---|---|---|
| 1 | Scan Jynx QR code | Pokédex entry unlocked |
| 2 | Accumulate 100 points | Island Scan unlocked |
| 3 | Activate scan | Rare Pokémon appears |
| 4 | Visit location | Encounter Jynx |
This system allows players to access Pokémon that may not normally appear early in the game.
Where to Find Jynx After Scanning
After using Island Scan, Jynx appears in a specific location depending on the day.
Jynx Location Details
| Island | Location | Day Available | Level Range |
|---|---|---|---|
| Ula’ula Island | Mount Lanakila | Sunday | Level 30 |
Important Notes
- Jynx only appears once per scan session
- You have 1 hour to find and catch it
- It does not respawn until next Island Scan
Because of this, preparation is key before activating Island Scan.
Best Strategy to Catch Jynx Easily
Catching Jynx can be tricky due to its speed and special attack. However, with the right approach, it becomes much easier.
Recommended Strategy
- Bring Pokémon with False Swipe
- Use status conditions like Sleep or Paralysis
- Carry Ultra Balls or Timer Balls
- Save before encounter
Battle Preparation Table
| Strategy Element | Why It Helps |
|---|---|
| False Swipe | Leaves Jynx at 1 HP |
| Sleep moves | Increases catch rate |
| Timer Balls | Better in longer battles |
| Save game | Retry if needed |
Using these methods significantly boosts your chances of success.
Pros and Cons of Using QR Codes
Pros
- Quick Pokédex registration
- Saves time searching
- Unlocks rare Pokémon early
- Easy to use
Cons
- Requires Island Scan cooldown
- Limited appearance window
- Only one encounter per session
- Requires preparation
While QR codes are powerful, they still require smart planning.
Common Mistakes to Avoid
Even experienced players sometimes misuse the QR system. Avoid these mistakes to ensure success.
Top Mistakes
- Activating Island Scan unprepared
- Forgetting the correct day
- Not bringing enough Poké Balls
- Missing the 1-hour time limit
- Scanning random codes inefficiently
These errors can cost you the encounter entirely.
Best Practices for QR Code Scanning
To make the most of the system, follow these proven tips.
Smart QR Usage
- Scan multiple codes daily to build points
- Plan scans around target Pokémon days
- Use online QR databases for accuracy
- Combine with Pokédex completion goals
Optimization Table
| Practice | Benefit |
|---|---|
| Daily scanning | Faster Island Scan unlock |
| Target planning | Better rare Pokémon access |
| Preparation | Higher catch success |
| Resource management | Efficient gameplay |
Consistency is key to mastering this feature.
Practical Example: Unlocking Jynx Quickly
Let’s walk through a real scenario.
You scan 10 QR codes in one session, reaching 100 points. Then:
- You wait until Sunday
- Activate Island Scan
- Fly to Mount Lanakila
- Locate Jynx in the grass
- Use Sleep + Ultra Ball combo
Within minutes, you successfully catch Jynx without grinding.
This is why QR codes are such a powerful tool in Ultra Moon.
Why Jynx Is Worth Getting
Jynx isn’t just a collectible—it’s a strong addition to your team.
Key Strengths
- High Special Attack
- Strong Ice-type moves
- Useful against Dragon types
- Unique Psychic coverage
Weaknesses
- Low Defense
- Vulnerable to common types
- Requires careful positioning
Still, when used correctly, Jynx can be a valuable asset.
Advanced Tips for Island Scan
If you want to go beyond basics, these advanced strategies will help.
Pro-Level Tips
- Save Island Scan for rare Pokémon only
- Track weekly rotation schedule
- Combine with EV training routes
- Use Repels to control encounters
These techniques separate casual players from experienced ones.
Conclusion
Using the jynx qr code ultra moon method is one of the fastest and most efficient ways to unlock and catch Jynx in the game.
With the QR Scanner and Island Scan features, you can bypass traditional grinding and access rare Pokémon with ease. However, success depends on preparation, timing, and strategy.
By following this guide, you’ll not only catch Jynx but also master one of Ultra Moon’s most powerful mechanics.
FAQs
1. Can I catch Jynx without QR codes in Ultra Moon?
Yes, but it’s much rarer and harder to find compared to using Island Scan.
2. How often can I use Island Scan?
Once every 24 hours after reaching 100 QR points.
3. Does the Jynx QR code guarantee a catch?
No, it only unlocks the encounter. You still need to battle and catch it.
4. Can I scan the same QR code multiple times?
No, each QR code can only be scanned once per save file.
5. What happens if I miss Jynx during Island Scan?
You’ll need to wait and use Island Scan again on the next eligible day.
Continue Reading on Wilddiscs

Security often feels abstract until something goes wrong with a phone you rely on every single day. Many people postpone updates because they are busy, worried about storage space, or simply annoyed by repeated reminders. In reality, those small update notifications represent ongoing work to keep your device safe, stable, and useful in daily life. Skipping them may seem harmless at first, but over time, it quietly increases risks that affect your data, finances, and overall phone experience. To clarify why this matters so much, in this article, we explain the real-world reasons regular phone updates are essential and how they protect you long term.
Reason 1: Critical Security Patches
Updates Fix Vulnerabilities Hackers Exploit
Every operating system has weaknesses that are discovered over time, even after a phone is released. Hackers actively search for these flaws and share them within underground communities. When an update is released, it often quietly fixes a specific vulnerability that could be exploited remotely. In everyday terms, installing updates closes digital doors that attackers are trying to force open. Ignoring updates leaves those doors unlocked, even if everything seems normal on the surface. Over months or years, these unpatched gaps can accumulate and significantly increase your exposure to attacks.
Protects Your Personal and Financial Data
Your phone stores far more sensitive information than most people realize. Banking apps, saved passwords, personal photos, and private messages all live in one place. Security updates strengthen how this data is protected behind the scenes. Without them, malicious apps or phishing attacks have a higher chance of success. Regular updates reduce the risk that personal or financial information is stolen without your knowledge. This protection is especially important as mobile payments and digital identities become part of daily routines.
Reason 2: Essential Bug Fixes and Stability
Resolves Annoying Glitches and Crashes
Small software bugs can slowly turn into major frustrations in daily use. You may notice apps freezing, notifications arriving late, or the screen becoming unresponsive at random times. These issues are often already known by developers and addressed in updates. Installing updates replaces unstable code with improved versions. Over time, this leads to a noticeably smoother and more reliable experience. Fewer interruptions also mean less stress when you rely on your phone for work or family communication.
Improves Overall System Performance
Performance problems are not always caused by aging hardware alone. Inefficient software processes can waste system resources and slow everything down. Updates often optimize how memory, storage, and processing power are used. This means apps open faster and multitasking feels smoother. Even older phones can feel more responsive simply by staying up to date. Consistent performance improvements can make a device feel renewed instead of worn out.
Reason 3: New Features and App Compatibility
Unlocks Useful New Tools and Improvements
Updates do more than fix problems; they often add practical features that improve daily life. These can include better privacy controls, smarter battery management, or accessibility improvements. While each feature may seem small, together they significantly enhance usability. Over time, updated phones feel more refined and capable. Skipping updates means missing out on improvements designed to make tasks easier. These refinements often reflect real user feedback gathered over millions of devices.
Ensures Latest Apps Work Properly
App developers design new versions based on the latest system software. If your phone is outdated, apps may stop updating or behave unpredictably. This can affect essential tools like navigation, communication, or work-related apps. In daily use, this creates friction and limits functionality. Keeping your phone updated ensures compatibility with the apps you rely on most. It also reduces the risk of sudden app failures when services update their requirements.
Reason 4: Maximizing Your Phone’s Lifespan
Keeps Your Device Relevant and Secure Longer
Regular updates extend the useful life of a phone by keeping it secure against new threats. This means you can safely use your device for many years without worrying about vulnerabilities. Updated software also adapts the phone to evolving online services. In practical terms, your phone stays useful instead of feeling outdated too quickly. This long-term relevance saves money and reduces frustration. It also allows you to delay making difficult upgrade decisions.
Delays the Need for a Premature Upgrade
Many people replace phones because they feel slow or unreliable, not because the hardware is broken. Software updates often resolve these issues and restore confidence in daily use. By keeping your phone updated, you delay the need to buy a new device. This approach is both economical and environmentally responsible. A well-maintained phone can meet your needs longer than expected. Over time, this habit helps you get full value from your original purchase.
Conclusion
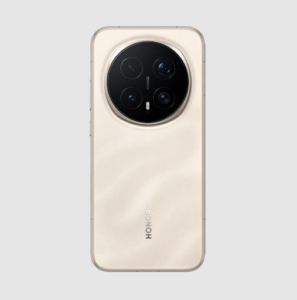
Regular updates should be treated as routine maintenance, much like locking your door or backing up important files. In everyday life, the few minutes spent updating can prevent hours of stress caused by security issues or system failures. Updates help protect your data, improve performance, and keep your phone compatible with modern apps. When some users eventually decide it is time to move on from an aging device, switching to a newer, well-supported phone—such as the HONOR Magic 8 Pro smartphone—can make staying updated easier and more reliable in the long run. Ultimately, turning updates into a habit rather than a decision helps keep your digital life safer and smoother every day.
-

 TECHNOLOGY12 months ago
Top 10 Must-Read Stories from Kristen Archives You Can’t Miss
-

 TECHNOLOGY1 year ago
Sky Bri Net Worth Revealed: How She Built Her Financial Empire
-

 TOPIC2 years ago
Basement Renovation Contractors: How They Tackle Structural Issues During Renovations
-

 BEAUTY2 years ago
Revitalize Your Hair with Oribe Hair Care for Damaged Hair: Style It with Blue Dresses for Weddings and Events
-

 TOPIC1 year ago
5 Reasons the //Vital-Mag.Net Blog Dominates Lifestyle
-
TOPIC1 year ago
Should You Move from Thousand Oaks CA to Los Angeles?
-

 TOPIC1 year ago
Top 10 Articles from the ://Vital-Mag.net Blog That You Can’t Miss
-

 TOPIC1 year ago
Moving To Irvine: Tips For A Smooth Transition To Orange County