
TECHNOLOGY
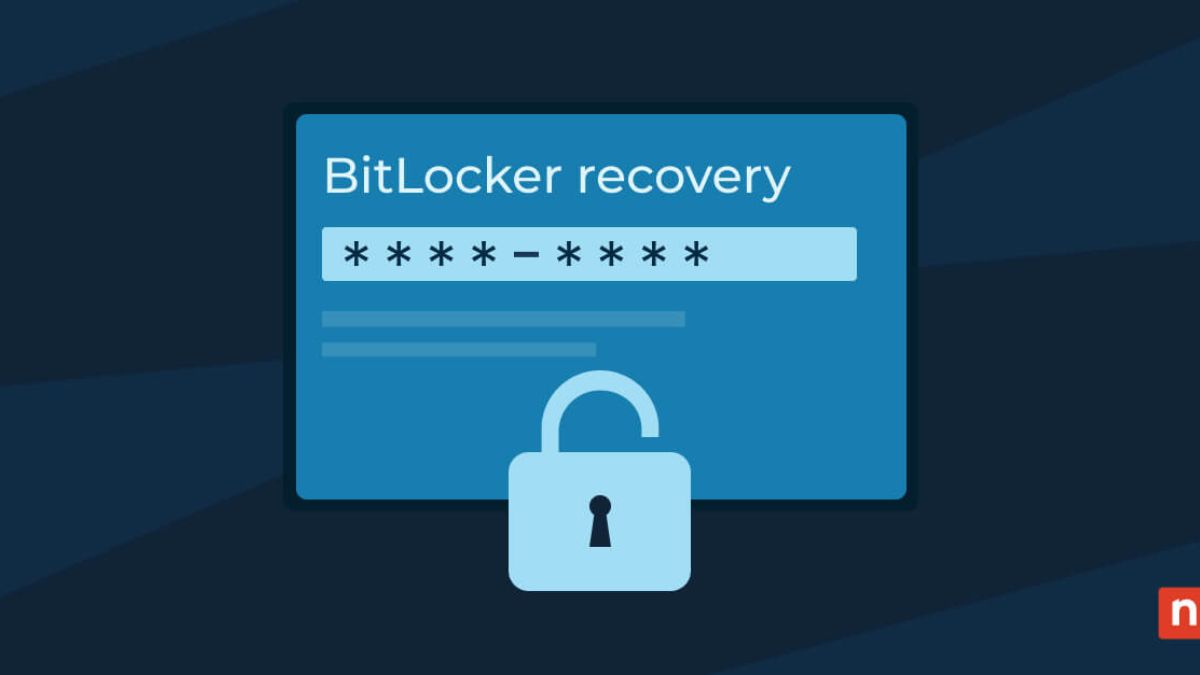
Understanding BitLocker Recovery Key: What You Need to Know
In today’s digital landscape, security is paramount. With sensitive data at our fingertips, protecting it has never been more crucial. Enter BitLocker—a powerful encryption tool that safeguards your files by locking them behind a virtual vault. But what happens when you can’t access that vault because you’ve lost the key? That’s where the BitLocker Recovery Key comes into play. Understanding this essential component not only secures your information but also gives you peace of mind in case of emergencies. Let’s dive into everything you need to know about the BitLocker Recovery Key and ensure you’re well-prepared for any situation!
What is BitLocker Recovery Key?
The BitLocker Recovery Key is a vital asset for anyone using Microsoft’s encryption technology. It serves as a backup access point when you cannot unlock your encrypted drive through standard means.
When BitLocker encrypts your hard drive, it generates this recovery key automatically. This unique, 48-digit numerical code acts like a safety net. If you forget your password or if the system detects unusual activity, the recovery key grants you entry.
This key can be saved in various formats: printed on paper, stored on a USB drive, or kept in your Microsoft account. The flexibility of storage options makes it easier to safeguard against loss while ensuring quick access when needed.
Understanding what the BitLocker Recovery Key is and how it functions is essential for maintaining seamless security over your data without compromising accessibility.
How Does BitLocker Work?
BitLocker is a powerful encryption tool built into Windows operating systems. It primarily protects data by encrypting the entire disk drive. This means that even if someone steals your hard drive, they can’t access your files without the correct key.
The process begins during system startup. BitLocker uses a unique key stored in a secure location on your machine, often linked to your hardware’s Trusted Platform Module (TPM). This module ensures that only authorized users can unlock and access the encrypted data.
When you log in, BitLocker checks for any unauthorized changes to the system. If everything matches up, it decrypts the drive seamlessly so you can use it like normal. Otherwise, it prompts for a recovery key or password, adding an extra layer of security against unauthorized access.
This combination of encryption and authentication makes BitLocker an effective solution for safeguarding sensitive information on Windows devices.
Why is a BitLocker Recovery Key Important?
A BitLocker Recovery Key serves as a vital safety net for your encrypted data. When you enable BitLocker on your device, it locks away sensitive information to protect it from unauthorized access. However, this security comes with the risk of being locked out yourself if something goes wrong.
Imagine losing access due to hardware changes or forgotten passwords. Without the recovery key, regaining entry can be nearly impossible. This is where its importance shines through.
Moreover, in an age filled with cyber threats, having that extra layer of assurance is crucial. Should malware attempt to compromise your system, the recovery key provides a backup plan for retrieving your files.
Storing the recovery key securely ensures peace of mind while navigating today’s digital landscape. It’s not just a string of numbers; it’s your ticket back into a secure environment when things go awry.
Where to Find Your BitLocker Recovery Key
Finding your BitLocker Recovery Key can be crucial if you ever need to unlock your encrypted drive. Fortunately, there are several places where it might be stored.
First, check your Microsoft account. If you enabled BitLocker while logged in, the recovery key is often saved automatically in the cloud. Simply log into your Microsoft account and navigate to the “Devices” section.
If you’re using a work or school device, ask your IT department. They may have policies for backing up recovery keys centrally.
You could also look on printed documents if you chose to physically save it during setup. Some users opt to write down their keys for safekeeping.
Explore any USB drives that were used as part of the BitLocker setup process. Sometimes users store their recovery keys on removable media for easy access when needed.
How to Generate a New BitLocker Recovery Key
Generating a new BitLocker recovery key is straightforward. First, open the Control Panel on your Windows device and navigate to “System and Security.”
From there, select “BitLocker Drive Encryption.” Locate the drive you want to manage. Click on “Manage BitLocker” next to it.
You’ll find an option labeled “Back up your recovery key.” Choose this option for several methods of saving the key.
Select one that suits you best—save it to your Microsoft account, print it out, or store it in a USB flash drive. Each method ensures you have access if needed later.
Once you’ve saved the key, it’s crucial to keep that location secure. This way, you’re protected against data loss due to forgotten passwords or hardware changes without risking unauthorized access.
Tips for Keeping Your BitLocker Recovery Key Safe
Keeping your BitLocker recovery key safe is crucial for ensuring the security of your data. Start by storing it in a secure location, such as a password manager. These tools offer encryption and can safeguard sensitive information effectively.
Avoid saving the recovery key on the same device you are encrypting. If something happens to your computer, having it stored there could lead to unauthorized access.
Consider writing down the recovery key on paper and keeping it in a locked drawer or safe at home. This physical backup adds an extra layer of protection against digital threats.
Regularly review where you’ve saved your recovery key. Ensure that only trusted individuals have access if you’re sharing devices with family or colleagues.
Educate yourself about potential phishing scams that may target sensitive information like your BitLocker recovery key. Stay vigilant and cautious while navigating online spaces.
Conclusion
BitLocker is a built-in encryption tool available in certain versions of Windows. It helps secure your data by encrypting the entire drive, making it inaccessible to unauthorized users. The BitLocker recovery key acts as a failsafe. If you forget your password or if something goes wrong with your encryption setup, this key allows you to regain access to your files.
When you enable BitLocker on a drive, it uses the Trusted Platform Module (TPM) hardware component in your computer or other means like passwords and PINs for authentication. Once activated, all data written on the encrypted drive gets scrambled automatically until it’s accessed using an authorized method—ensuring that only those who have permission can view sensitive information.
The importance of having a reliable recovery key cannot be overstated. If you lose access due to forgotten passwords or technical failures, the recovery key provides an alternative route back into your system. Without it, retrieving lost files might become impossible, potentially resulting in critical data loss.
Finding your recovery key may seem daunting at first; however, Microsoft has made it relatively straightforward. Your key could be saved in several places such as printed documents during initial setup or stored online with your Microsoft account under “Devices.” Additionally, institutions often manage these keys within their IT departments for better security measures.
If you’ve misplaced or need another copy of your existing recovery key, generating a new one is simple but requires some steps. Open Control Panel and navigate through System and Security into Manage BitLocker options; here you’ll find choices related to managing keys including backing up current ones alongside creating new copies directly linked with active drives.
Keeping track of your bitlocker recovery key should be taken seriously given its importance! Store
Introduction
If you’ve ever used Quizizz for teaching or training, you’ve probably wondered about the quizizz time limit and how it affects performance. Time settings can shape how students engage, think, and respond. Set it too short, and learners feel rushed. Set it too long, and focus may drop.
In this guide, you’ll learn exactly how the Quizizz time limit works, how to adjust it effectively, and how to use it strategically to improve learning outcomes. Whether you’re a teacher, trainer, or course creator, mastering this feature can make a big difference.
What Is Quizizz Time Limit?
The Quizizz time limit refers to the amount of time allowed for each question or the entire quiz. It controls pacing and influences how participants interact with the content.
Key Points:
- Time can be set per question
- It impacts scoring and engagement
- It can be adjusted depending on difficulty level
- It helps maintain focus and discipline
Quick Definition (Featured Snippet Ready)
Quizizz time limit is the duration assigned to answer each question or complete a quiz, designed to control pacing and enhance engagement.
Types of Time Limits in Quizizz
Understanding the different types of time settings helps you design better quizzes.
1. Per-Question Time Limit
Each question has a fixed time (e.g., 30 seconds).
2. Overall Quiz Timer
A total time limit for the entire quiz session.
3. No Time Limit Mode
Participants can answer at their own pace.
Comparison of Time Limit Types
| Time Setting Type | Best Use Case | Benefits | Drawbacks |
|---|---|---|---|
| Per-Question Timer | Fast-paced quizzes | Keeps students focused | Can stress slower learners |
| Overall Quiz Timer | Exams and assessments | Encourages time management | Harder to control pacing |
| No Time Limit | Practice or homework | Reduces pressure | May reduce engagement |
How to Set Time Limits in Quizizz
Setting the time limit is straightforward but requires thoughtful planning.
Step-by-Step Guide:
- Create or open a quiz
- Edit a question
- Locate the timer option
- Select time (5 seconds to several minutes)
- Save changes
Pro Tip:
Start with moderate timing (30–60 seconds) and adjust based on student feedback.
Why Time Limits Matter in Learning
Time constraints are more than just a setting—they shape behavior.
Benefits of Using Time Limits:
- Improves focus and attention
- Encourages quick thinking
- Prevents distractions
- Simulates real exam conditions
However…
Too much pressure can lead to:
- Anxiety
- Guessing instead of thinking
- Reduced comprehension
Ideal Time Limit Based on Question Type
Different questions require different timing.
Recommended Timing Framework
| Question Type | Recommended Time | Reasoning |
|---|---|---|
| Multiple Choice (Easy) | 15–30 seconds | Quick recall |
| Multiple Choice (Hard) | 45–90 seconds | Requires analysis |
| True/False | 10–20 seconds | Simple decision-making |
| Open-ended | 1–3 minutes | Requires explanation |
| Image-based | 30–60 seconds | Needs visual interpretation |
Best Practices for Setting Quizizz Time Limits
1. Match Time with Difficulty
Harder questions need more thinking time.
2. Consider Your Audience
Younger students or beginners may need extra time.
3. Use Practice Mode First
Test timing before using it in real assessments.
4. Avoid Extreme Limits
Too short or too long can reduce effectiveness.
5. Monitor Performance Data
Adjust timing based on quiz results.
Practical Example
Let’s say you’re creating a science quiz:
- Easy questions: 20 seconds
- Medium questions: 45 seconds
- Hard questions: 75 seconds
This variation keeps the quiz balanced and fair.
Pros and Cons of Using Time Limits
Pros:
- Boosts engagement
- Encourages fast thinking
- Maintains quiz flow
- Simulates real exams
Cons:
- Can increase stress
- May disadvantage slower learners
- Encourages guessing if too strict
Common Mistakes to Avoid
1. Setting the Same Time for All Questions
Not all questions are equal.
2. Ignoring Student Feedback
Learners often reveal timing issues.
3. Overusing Tight Deadlines
This can reduce learning quality.
4. Not Testing the Quiz First
Always preview your quiz.
Advanced Strategies to Optimize Quizizz Time Limit
Use Adaptive Timing
Adjust time based on difficulty levels.
Combine with Power-Ups
Gamify the experience without over-relying on speed.
Analyze Reports
Quizizz provides performance data—use it.
Strategy Breakdown Table
| Strategy | How It Works | Outcome |
|---|---|---|
| Adaptive Timing | Vary time per question | Better fairness |
| Practice Mode First | Test before live quiz | Reduced errors |
| Data Analysis | Review quiz reports | Continuous improvement |
| Balanced Pressure | Moderate time constraints | Higher engagement |
When Should You Remove Time Limits?
There are situations where removing time limits is beneficial.
Use No Time Limit When:
- Teaching new concepts
- Supporting special needs learners
- Running homework assignments
- Encouraging deep thinking
Quizizz Time Limit for Different Use Cases
Classroom Learning
Moderate timing works best.
Competitive Quizzes
Short time limits increase excitement.
Exams
Use structured timing similar to real tests.
Best Practices Summary
- Keep timing flexible
- Align with difficulty
- Test before publishing
- Use feedback loops
- Avoid unnecessary pressure
Conclusion
The quizizz time limit is more than just a timer—it’s a powerful tool that shapes how learners interact with content. When used correctly, it improves focus, engagement, and performance. However, it requires thoughtful planning and constant adjustment.
By balancing challenge with fairness, you can create quizzes that are both effective and enjoyable. Start experimenting with different timing strategies, and you’ll quickly see the difference.
FAQs
1. What is the maximum time limit in Quizizz?
Quizizz allows several minutes per question, depending on settings, but exact limits may vary.
2. Can I remove the time limit in Quizizz?
Yes, you can choose a no-time-limit mode for self-paced learning.
3. Does time affect scoring in Quizizz?
Yes, faster correct answers often earn more points.
4. What is the best time limit for quizzes?
It depends on difficulty, but 30–60 seconds is common for most questions.
5. Can students pause the timer?
No, once the quiz starts, the timer runs continuously.
Continue Reading on Wilddiscs
Introduction
If you’re searching for jynx qr code ultra moon, you’re likely trying to unlock this iconic Ice/Psychic Pokémon quickly and efficiently. Fortunately, Pokémon Ultra Moon makes it easier than ever through the QR Scanner feature.
Instead of spending hours hunting in the wild, you can simply scan a QR code and register Jynx in your Pokédex—unlocking its location in seconds. But there’s more to it than just scanning.
In this guide, you’ll learn exactly how QR codes work, where to find Jynx afterward, and how to maximize your Island Scan rewards.
What Is the Jynx QR Code in Ultra Moon?
The Jynx QR code in Ultra Moon is a scannable code that allows players to register Jynx in their Pokédex instantly. Once registered, you can locate it using the Island Scan feature.
How QR Codes Work
- Open your Rotom Dex
- Select the QR Scanner
- Scan a valid Pokémon QR code
- Add the Pokémon to your Pokédex
- Build points toward Island Scan
Each scan gives you 10 points, and once you reach 100 points, you unlock Island Scan.
How to Use Jynx QR Code Ultra Moon
Step-by-Step Process
- Open your menu and launch the QR Scanner
- Scan the Jynx QR code
- Confirm Pokédex registration
- Continue scanning until you reach 100 points
- Activate Island Scan
- Travel to the correct island and location
Quick Breakdown Table
| Step | Action | Result |
|---|---|---|
| 1 | Scan Jynx QR code | Pokédex entry unlocked |
| 2 | Accumulate 100 points | Island Scan unlocked |
| 3 | Activate scan | Rare Pokémon appears |
| 4 | Visit location | Encounter Jynx |
This system allows players to access Pokémon that may not normally appear early in the game.
Where to Find Jynx After Scanning
After using Island Scan, Jynx appears in a specific location depending on the day.
Jynx Location Details
| Island | Location | Day Available | Level Range |
|---|---|---|---|
| Ula’ula Island | Mount Lanakila | Sunday | Level 30 |
Important Notes
- Jynx only appears once per scan session
- You have 1 hour to find and catch it
- It does not respawn until next Island Scan
Because of this, preparation is key before activating Island Scan.
Best Strategy to Catch Jynx Easily
Catching Jynx can be tricky due to its speed and special attack. However, with the right approach, it becomes much easier.
Recommended Strategy
- Bring Pokémon with False Swipe
- Use status conditions like Sleep or Paralysis
- Carry Ultra Balls or Timer Balls
- Save before encounter
Battle Preparation Table
| Strategy Element | Why It Helps |
|---|---|
| False Swipe | Leaves Jynx at 1 HP |
| Sleep moves | Increases catch rate |
| Timer Balls | Better in longer battles |
| Save game | Retry if needed |
Using these methods significantly boosts your chances of success.
Pros and Cons of Using QR Codes
Pros
- Quick Pokédex registration
- Saves time searching
- Unlocks rare Pokémon early
- Easy to use
Cons
- Requires Island Scan cooldown
- Limited appearance window
- Only one encounter per session
- Requires preparation
While QR codes are powerful, they still require smart planning.
Common Mistakes to Avoid
Even experienced players sometimes misuse the QR system. Avoid these mistakes to ensure success.
Top Mistakes
- Activating Island Scan unprepared
- Forgetting the correct day
- Not bringing enough Poké Balls
- Missing the 1-hour time limit
- Scanning random codes inefficiently
These errors can cost you the encounter entirely.
Best Practices for QR Code Scanning
To make the most of the system, follow these proven tips.
Smart QR Usage
- Scan multiple codes daily to build points
- Plan scans around target Pokémon days
- Use online QR databases for accuracy
- Combine with Pokédex completion goals
Optimization Table
| Practice | Benefit |
|---|---|
| Daily scanning | Faster Island Scan unlock |
| Target planning | Better rare Pokémon access |
| Preparation | Higher catch success |
| Resource management | Efficient gameplay |
Consistency is key to mastering this feature.
Practical Example: Unlocking Jynx Quickly
Let’s walk through a real scenario.
You scan 10 QR codes in one session, reaching 100 points. Then:
- You wait until Sunday
- Activate Island Scan
- Fly to Mount Lanakila
- Locate Jynx in the grass
- Use Sleep + Ultra Ball combo
Within minutes, you successfully catch Jynx without grinding.
This is why QR codes are such a powerful tool in Ultra Moon.
Why Jynx Is Worth Getting
Jynx isn’t just a collectible—it’s a strong addition to your team.
Key Strengths
- High Special Attack
- Strong Ice-type moves
- Useful against Dragon types
- Unique Psychic coverage
Weaknesses
- Low Defense
- Vulnerable to common types
- Requires careful positioning
Still, when used correctly, Jynx can be a valuable asset.
Advanced Tips for Island Scan
If you want to go beyond basics, these advanced strategies will help.
Pro-Level Tips
- Save Island Scan for rare Pokémon only
- Track weekly rotation schedule
- Combine with EV training routes
- Use Repels to control encounters
These techniques separate casual players from experienced ones.
Conclusion
Using the jynx qr code ultra moon method is one of the fastest and most efficient ways to unlock and catch Jynx in the game.
With the QR Scanner and Island Scan features, you can bypass traditional grinding and access rare Pokémon with ease. However, success depends on preparation, timing, and strategy.
By following this guide, you’ll not only catch Jynx but also master one of Ultra Moon’s most powerful mechanics.
FAQs
1. Can I catch Jynx without QR codes in Ultra Moon?
Yes, but it’s much rarer and harder to find compared to using Island Scan.
2. How often can I use Island Scan?
Once every 24 hours after reaching 100 QR points.
3. Does the Jynx QR code guarantee a catch?
No, it only unlocks the encounter. You still need to battle and catch it.
4. Can I scan the same QR code multiple times?
No, each QR code can only be scanned once per save file.
5. What happens if I miss Jynx during Island Scan?
You’ll need to wait and use Island Scan again on the next eligible day.
Continue Reading on Wilddiscs
Security often feels abstract until something goes wrong with a phone you rely on every single day. Many people postpone updates because they are busy, worried about storage space, or simply annoyed by repeated reminders. In reality, those small update notifications represent ongoing work to keep your device safe, stable, and useful in daily life. Skipping them may seem harmless at first, but over time, it quietly increases risks that affect your data, finances, and overall phone experience. To clarify why this matters so much, in this article, we explain the real-world reasons regular phone updates are essential and how they protect you long term.
Reason 1: Critical Security Patches
Updates Fix Vulnerabilities Hackers Exploit
Every operating system has weaknesses that are discovered over time, even after a phone is released. Hackers actively search for these flaws and share them within underground communities. When an update is released, it often quietly fixes a specific vulnerability that could be exploited remotely. In everyday terms, installing updates closes digital doors that attackers are trying to force open. Ignoring updates leaves those doors unlocked, even if everything seems normal on the surface. Over months or years, these unpatched gaps can accumulate and significantly increase your exposure to attacks.
Protects Your Personal and Financial Data
Your phone stores far more sensitive information than most people realize. Banking apps, saved passwords, personal photos, and private messages all live in one place. Security updates strengthen how this data is protected behind the scenes. Without them, malicious apps or phishing attacks have a higher chance of success. Regular updates reduce the risk that personal or financial information is stolen without your knowledge. This protection is especially important as mobile payments and digital identities become part of daily routines.
Reason 2: Essential Bug Fixes and Stability
Resolves Annoying Glitches and Crashes
Small software bugs can slowly turn into major frustrations in daily use. You may notice apps freezing, notifications arriving late, or the screen becoming unresponsive at random times. These issues are often already known by developers and addressed in updates. Installing updates replaces unstable code with improved versions. Over time, this leads to a noticeably smoother and more reliable experience. Fewer interruptions also mean less stress when you rely on your phone for work or family communication.
Improves Overall System Performance
Performance problems are not always caused by aging hardware alone. Inefficient software processes can waste system resources and slow everything down. Updates often optimize how memory, storage, and processing power are used. This means apps open faster and multitasking feels smoother. Even older phones can feel more responsive simply by staying up to date. Consistent performance improvements can make a device feel renewed instead of worn out.
Reason 3: New Features and App Compatibility
Unlocks Useful New Tools and Improvements
Updates do more than fix problems; they often add practical features that improve daily life. These can include better privacy controls, smarter battery management, or accessibility improvements. While each feature may seem small, together they significantly enhance usability. Over time, updated phones feel more refined and capable. Skipping updates means missing out on improvements designed to make tasks easier. These refinements often reflect real user feedback gathered over millions of devices.
Ensures Latest Apps Work Properly
App developers design new versions based on the latest system software. If your phone is outdated, apps may stop updating or behave unpredictably. This can affect essential tools like navigation, communication, or work-related apps. In daily use, this creates friction and limits functionality. Keeping your phone updated ensures compatibility with the apps you rely on most. It also reduces the risk of sudden app failures when services update their requirements.
Reason 4: Maximizing Your Phone’s Lifespan
Keeps Your Device Relevant and Secure Longer
Regular updates extend the useful life of a phone by keeping it secure against new threats. This means you can safely use your device for many years without worrying about vulnerabilities. Updated software also adapts the phone to evolving online services. In practical terms, your phone stays useful instead of feeling outdated too quickly. This long-term relevance saves money and reduces frustration. It also allows you to delay making difficult upgrade decisions.
Delays the Need for a Premature Upgrade
Many people replace phones because they feel slow or unreliable, not because the hardware is broken. Software updates often resolve these issues and restore confidence in daily use. By keeping your phone updated, you delay the need to buy a new device. This approach is both economical and environmentally responsible. A well-maintained phone can meet your needs longer than expected. Over time, this habit helps you get full value from your original purchase.
Conclusion
Regular updates should be treated as routine maintenance, much like locking your door or backing up important files. In everyday life, the few minutes spent updating can prevent hours of stress caused by security issues or system failures. Updates help protect your data, improve performance, and keep your phone compatible with modern apps. When some users eventually decide it is time to move on from an aging device, switching to a newer, well-supported phone—such as the HONOR Magic 8 Pro smartphone—can make staying updated easier and more reliable in the long run. Ultimately, turning updates into a habit rather than a decision helps keep your digital life safer and smoother every day.
-

 TECHNOLOGY1 year ago
Top 10 Must-Read Stories from Kristen Archives You Can’t Miss
-

 TECHNOLOGY2 years ago
Sky Bri Net Worth Revealed: How She Built Her Financial Empire
-

 TOPIC2 years ago
Basement Renovation Contractors: How They Tackle Structural Issues During Renovations
-

 BEAUTY2 years ago
Revitalize Your Hair with Oribe Hair Care for Damaged Hair: Style It with Blue Dresses for Weddings and Events
-

 TOPIC1 year ago
5 Reasons the //Vital-Mag.Net Blog Dominates Lifestyle
-
TOPIC1 year ago
Should You Move from Thousand Oaks CA to Los Angeles?
-

 TOPIC1 year ago
Things To Know Before Moving To Burlingame, CA
-

 TOPIC1 year ago
Reasons You Should Move to San Francisco