
CONSTRUCTION
10 Common Mistakes to Avoid in House Construction
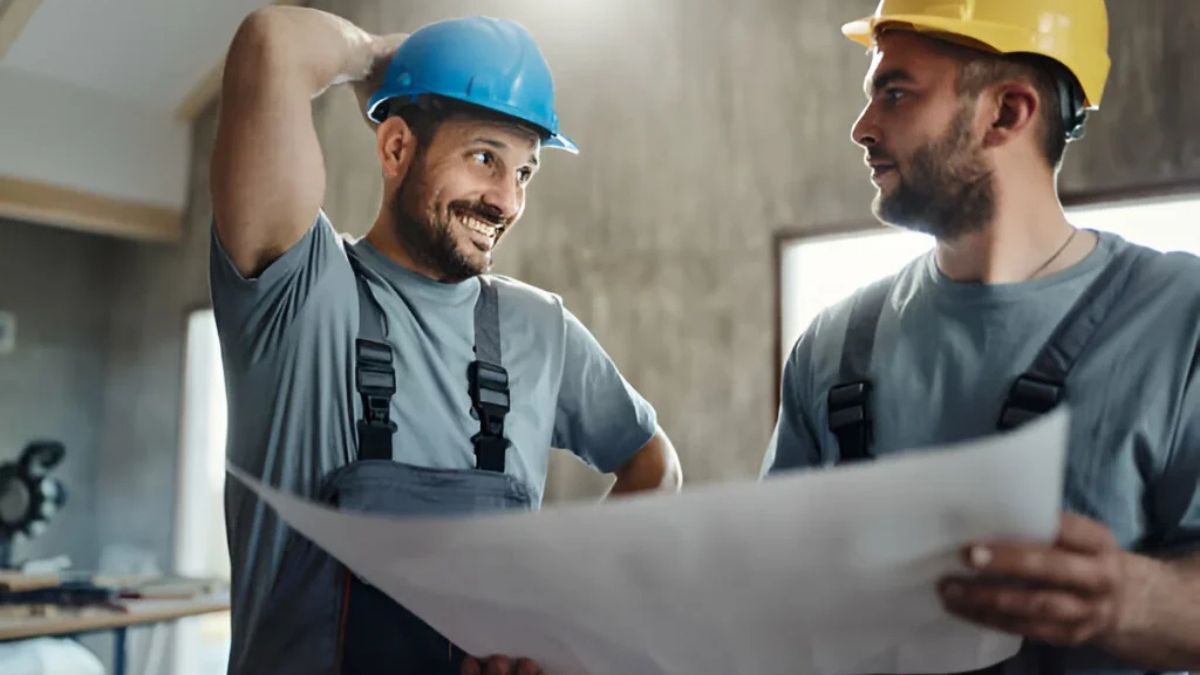
Neglecting long-term planning can result in layouts that fail to adapt to future family or lifestyle changes. From budgeting issues to design decisions, house construction mistakes can have long-lasting impacts on both the project and the final product. Whether choosing new construction homes or renovating an existing structure, avoiding common pitfalls can save time, money, and stress.
To ensure success in a construction project, a proactive and aware individual should understand possible mistakes in house construction. The following article has outlined the ten most common mistakes to be avoided during construction and how tips for avoiding mistakes and making the most of this journey can be implemented. For more insights and detailed information about construction practices, you can view company profile to explore expert services and solutions.
1. Skipping Proper Budgeting
The most common mistake that is made during house construction is not setting a budget. Many homeowners underestimate the costs of materials, labor, permits, and unexpected expenses. In Odessa, Texas, the economic conditions such as fluctuations due to the local oil and gas industry can lead to sudden material cost changes and labor shortages. Building new construction homes in Odessa, Texas would require setting a clear budget. Without an established financial plan, starting the construction project leads to running out of funds mid-project, resulting in making rushed decisions or even halting the project.
Poor budgeting consequences include:
- Delays in the project due to insufficient funds.
- Lower quality of the materials.
- Unforeseen additional costs that are hard to cover.
How to avoid this mistake: To avoid budget issues, prepare for contingencies. It is always wise to factor in an additional 10-15% of the overall budget to account for surprises.
2. Ignoring Zoning and Permit Requirements
Before commencing construction on your dream home, make sure that you have all the necessary permits and zoning approvals in place. Zoning laws regulate land use, and not complying with these regulations can lead to costly fines, project delays, or even demolition of parts of the house.
Risks of not considering zoning and permits:
- Legal issues or fines.
- The possibility of halting construction if permits are not obtained.
- Delays in project timelines.
How to avoid this mistake: Research local zoning laws and building codes before beginning construction. Consult with local authorities or hire a professional to ensure you’ve covered all necessary permits.
3. Overlooking Site Preparation
Proper site preparation is the foundation of a stable and durable home. Inadequate land preparation can lead to poor drainage, uneven foundations, or structural issues later on. Site preparation is crucial to ensure the stability of the structure and prevent future complications.
Consequences of neglecting site preparation:
- Water drainage problems lead to flooding or erosion.
- Poor foundation quality, affecting the entire structure.
- Increased maintenance costs.
How to avoid this mistake: Hire a qualified contractor who will conduct a thorough site assessment. This would involve checking the soil quality. He should also conduct soil testing and assess the land for stability. If the land sits on a slope, ensure proper grading for water dissipation away from the foundation.
4. Cutting Corners on Materials
It is easy to be tempted to use cheaper materials to save money, but this often leads to problems down the line. Using low-quality materials often results in higher maintenance costs, increased utility bills, and a reduced home lifespan.
Risks of using inferior materials:
- Higher long-term repair and maintenance costs.
- Safety concerns due to substandard materials.
- Reduced property value.
How to avoid this mistake: Qualify your budget. Invest in durable materials on essentials such as roofing, flooring, and windows. Though some materials may seem to save you money at first because it’s cheaper, durability and energy efficiency can actually help you save money.
5. Poor Communication with the Contractors
In any successful construction, communication with contractors is very fundamental. Misunderstandings or lack of clarity may lead to delay, wrong construction, or unsatisfactory results. Lack of alignment between contractors and homeowners can cause frustrations and derail the project.
Consequences of poor communication:
- Delays in the timeline of the project.
- Mistakes in design or execution.
- Frustration and conflict between the contractors and homeowners.
How to avoid this mistake: Set clear expectations from the start. Discuss your house plans in detail, outlining key design features, budgets, and timelines. Regularly check in with contractors to ensure the project stays on track.
6. Not Accounting for Future Expansion Needs
Skipping long-term planning can lead to layouts that fail to adapt well to future changes in family or lifestyle. The average homeowner considers what the current needs of the family are, and one should be concerned about the expansion that may arise later. Thus, the house plans you adopt must be able to adapt to later expansions.
Reasons for failure not to plan for expansion:
- They lack ample space for family expansion.
- Rigid floor plans that cannot change.
- Higher costs and disruption if you need to add rooms later.
How to avoid this mistake: In developing house plans, leave some room for expansion or conversion of spaces, like an extra bedroom, bathroom, or even a home office. Consider how your needs might change with the passage of time and design your house along those lines.
7. Lacking Focus on Energy Efficiency
Modern homeowners are increasingly aware of the importance of energy efficiency. Failure to design with an energy-efficient concept leads to skyrocketing utility bills and an uncomfortable indoor living environment. An improperly insulated home, or inefficient HVAC systems and windows, will waste huge amounts of energy.
Consequences of poor energy efficiency:
- High utility bills.
- Uncomfortable indoor temperatures.
- A negative environmental impact.
How to avoid this mistake: Put energy-efficient components into your house plans right at the beginning. Use proper insulation, energy-efficient windows, and programmable thermostats that will save on energy. In addition, take advantage of solar panels, energy-efficient appliances, and LED lighting to lower energy use in your home.
8. Underestimating the Importance of Timing
Construction projects often face delays, but proper planning can minimize these risks. Miscalculations of construction timelines may lead to poor decisions that may rush and compromise quality or may be late for their deadlines.
Consequences of poor timing:
- Delayed project.
- Increased cost with extended labor and material cost.
- Rushed work that compromises quality.
How to avoid this mistake: Set realistic expectations for the timeline and be flexible. Construction projects can be very unpredictable and it is important to make plans ahead. Work closely with contractors to create a timeline that has built-in contingencies.
9. Overcomplicating the Design
It is easy to get carried away with elaborate designs when choosing house plans, but overcomplicating the design can lead to unnecessary expenses, delays, and potential structural issues.
Risks of overly complicated designs:
- Higher construction costs.
- Increased construction time.
- Potential for design flaws or mistakes.
How to avoid this mistake: Emphasis on simplicity and practicality. While intricate features or trends may be tempting, ensure the design is practical and suits your lifestyle.
10. Ignoring Safety Standards
Safety in house construction will have to abide by strict regulations and codes of standards. Neglectful construction increases the risk of accidents, injuries, and legal issues. All aspects of safety protocol must be in place to avoid harming workers and homeowners as well as the built structure.
Unsafe safety standards repercussions:
- On-site injuries or deaths.
- Legal penalties or fines
- Poor living conditions after house construction.
How to avoid this mistake: Make sure that contractors follow all the local building codes and safety standards. Hire professional and qualified personnel and ensure they follow safety measures at the job site.
Conclusion
House construction is both complex and exciting, but avoiding common pitfalls is crucial for success. Proper planning, budgeting, and employing skilled professionals at work can bring you a functional home that, in the long term, can respond to the demands of your growing family.
FAQs
How can I avoid construction cost overruns?
Set a reasonable budget with extra funds allocated to cover unforeseen expenses. Stay in close communication with your contractor to track and adjust progress when needed.
How do I make sure my house is energy-efficient from day one?
Consider using high-quality insulation, energy-efficient windows, and modern HVAC systems. Design elements should provide maximum natural lighting and air movement.
How can I prepare for future expansions without compromising what is currently being built?
Plan for flexible spaces that could easily be adapted or expanded according to future needs. Leave enough space for the future addition of an extra bedroom or office, for example.
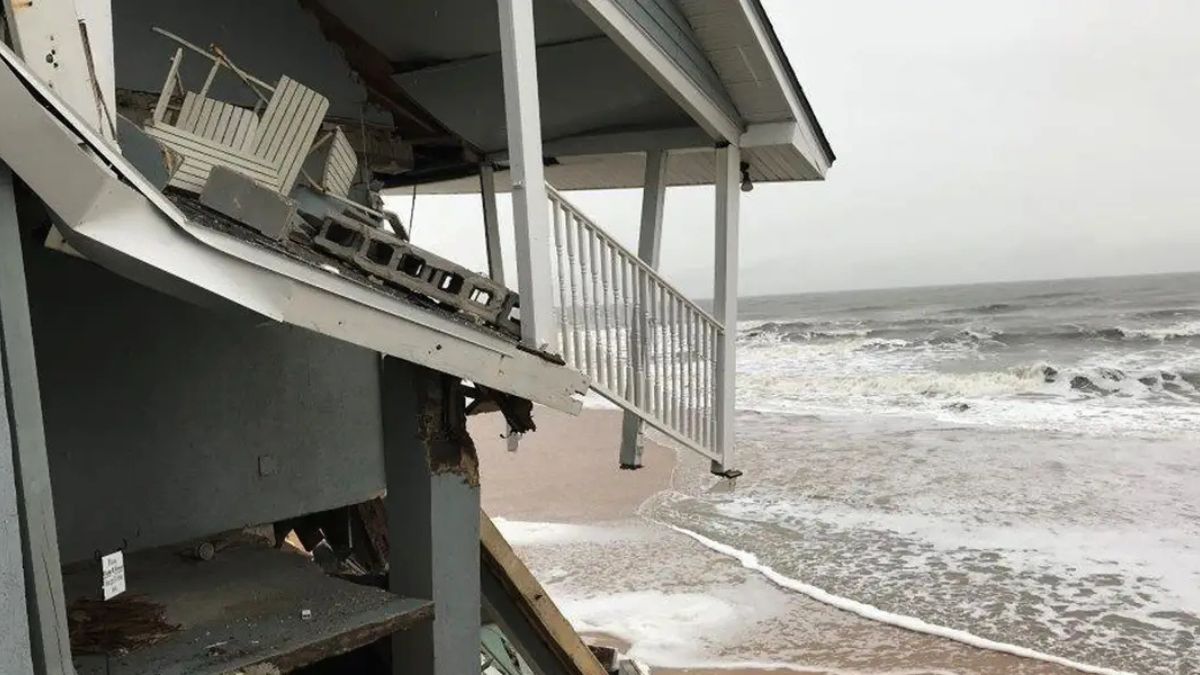
When Hurricane Beryl hit, big cities faced long delays—cleanup crews stretched thin, insurance adjusters overwhelmed, and essential repairs stalled. Yet across many small towns, recovery moved faster. Debris was cleared quickly, emergency funds reached families sooner, and home repairs got underway without red tape. This wasn’t luck—it was the result of quiet systems built well before the storm and tight-knit communities ready to act the moment disaster strikes.
Small towns may seem especially vulnerable during major hurricanes—limited emergency services, aging infrastructure, smaller budgets. Yet time and again, they bounce back faster than larger cities. Their secret? Trust, preparation, and strong local relationships. From pre-storm contractor lists to volunteer-led cleanup teams and fast community-bank funding, these towns rely on each other long before outside help arrives—leading to quicker recovery and stronger resilience after every storm.
Local Hurricane Beryl Insurance Attorneys Help Speed Up Claims
A Hurricane Beryl insurance attorney with local experience can make the claims process smoother and faster. Familiarity with area-specific damage patterns, policy language, and common insurer tactics allows for quick and effective action. The attorney helps gather strong evidence, negotiates directly with adjusters, and pushes back when initial offers fall short.
Using pre-made case templates, local attorneys can act swiftly to file claims, providing residents with much-needed support during a stressful recovery period. With a deep understanding of the area and its unique challenges, they can tailor each case to fit individual circumstances—helping residents maximize their coverage.
Local Contractors and Storm Rebuild Priority Lists
Small-town contractors often organize pre-storm sign-up lists to speed up home repairs once a hurricane passes. Homeowners who join early can access help without the long delays typically associated with large firms. Local builders work closely with nearby suppliers, making it easier to source materials quickly and avoid national supply chain bottlenecks.
Trust within the community makes a real difference. Word-of-mouth connects residents with reliable contractors whose reputations are already known. Familiarity with local needs reduces risk and stress during recovery. Reaching out to a contractor before hurricane season starts can accelerate repair timelines when every day counts.
Faster Recovery Through Community Bank Disaster Programs
Community banks play a frontline role in hurricane recovery by offering immediate, relationship-driven funding. Unlike large banks tied to corporate approval chains, local lenders cut through red tape, approving storm-related loans within hours—not days. Their deep connection to the community means less paperwork, fewer delays, and more trust when it matters most.
Many community banks activate pre-approved disaster credit lines for customers with strong account histories, making it easier to access funds for urgent home repairs or temporary living costs. Some also offer skip-payment options on existing loans to free up cash flow after storms. Because these banks understand local recovery timelines, they tailor terms around real community needs, helping families rebuild quickly while waiting for insurance payouts.
Utility Recovery Through Local Electric Cooperative Memberships
Being part of a local electric co-op offers small-town residents a clear advantage after hurricanes. Since members partly own the system, crews often prioritize their own neighborhoods. That means faster power restoration compared to large-scale utilities. Co-ops respond quickly, reduce delays, and focus on helping neighbors—because the people served are also stakeholders.
Direct communication with members allows for quicker outage response without layers of bureaucracy. Many co-ops also offer repair funds or bill credits that eventually return value to the community. Enrolling before storm season can improve recovery outcomes for individual households and the broader area.
Quick Cleanups by Volunteer-Led Response Teams
Volunteer groups in small towns often mobilize within hours after a hurricane, typically organized through churches, nonprofits, and local community networks. Their knowledge of local streets and residents allows them to coordinate quickly and direct help where it’s needed most. Early actions like boarding windows, clearing debris, and covering damaged roofs provide fast relief before professional services can respond.
Many of these groups keep essential tools and supplies on standby, allowing them to act without delay. Building connections with volunteer networks before hurricane season guarantees faster access to immediate help and keeps recovery efforts organized during key early hours.
Faster hurricane recovery happens when local systems are ready before the storm hits. Contractor sign-up lists makes sure repairs begin without costly delays. Community banks deliver quick, flexible funding when national systems stall. Local attorneys resolve claims with sharper, area-specific knowledge. Electric co-ops restore power sooner by prioritizing members over distant accounts. Volunteer crews mobilize rapidly, providing immediate help while larger organizations remain tied up. Real speed comes from preparation, trust, and community—not from size or scale.

Building your own plunge pool can seem confusing, with so many steps like site prep and plumbing to handle. Many people face the same questions about the pool installation process, safety rules, and how to find trusted pool makers.
It helps to know that 1 in 4 DIYers say clear guides help them finish backyard landscaping jobs faster. This step-by-step guide breaks each task down using simple words and real examples of swimming pools, common pool sizes, filtration systems, and tools such as rebar rods or concrete blocks.
Keep reading for key tips that make building a custom plunge pool easy and much less stressful!
Key Takeaways
- Clear the area and check laws before starting. Use tools to make the ground level.
- Dig a hole and fix the pool base with gravel or sand. Make sure it’s flat.
- Put in the pool structure, add steel bars for strength. Set up pipes, filters, and pumps for clean water.
- Backfill around your pool with soil or gravel. Add decks or plants for looks and safety.
- Always get permits and follow local rules to avoid fines and problems later.
Site Preparation
Site preparation sets the stage for your plunge pool project—good ground work means fewer problems later. You’ll need basic tools like a shovel, wheelbarrow, and compactor to get things ready for safe pool construction.
Clear the area of debris and vegetation
I use a rake and shovel to remove all weeds, grass, sticks, and rocks from the planned plunge pool spot. Any tree roots or large stones need removing with a spade or crowbar. Clearing junk means bricks, old boards, or plastic also must go; nothing should stay that could damage the pool materials during construction.
I set up temporary safety fencing around the work area after clearing it. This meets local rules for pool installation process safety standards. It keeps children and pets out while I finish site preparation tasks like leveling ground for drain lines or filtration system pipes.
Extra soil goes into piles for backyard landscaping later or gets hauled away as needed by waste companies—no mess left behind before excavation starts.
Check local zoning laws and secure permits
After I clear all debris and plants, the next step is to look up local zoning rules. Every city or county has its own building codes for pool construction. These laws control plunge pool dimensions, fencing, drainage systems, and even pool depth limits.
I contact the building department before starting any work. Most places need a permit for diy plunge pool installation—no exceptions. Missing this part leads to high fines or forced removal of my in-ground plunge pool.
Permits also require me to follow safety rules like adding locked gates or specific pool equipment such as alarms.
Some states offer tax deductions if my doctor says a custom plunge pool is needed for medical reasons; I file forms showing proof with the permit request. My homeowners insurance goes up after installing a plunge pool too; every insurer asks about code compliance and permits first to avoid denied claims later on.
Skip checking these rules, I risk mistakes that cost thousands. Many cities list approved contractors and instructions online—easy ways to double-check requirements for foundation type, filtration system specs, electrical connections for heaters or solar-powered features like water features or lighting systems.
This simple research keeps my project legal and safe from start to finish.
Level the ground and ensure proper drainage
I check the soil stability in the cleared area first. Any soft or loose dirt means trouble later for pool installation. I use a spirit level to make sure every part of the ground sits flat.
Uneven land causes water pooling, cracks, or shifting over time.
Proper drainage is vital. I plan sloped paths so rain flows away from my plunge pool site and not toward it. Gravel trenches or drainpipes can help move water fast; this stops soggy soil and keeps my pool structure safe from damage.
Nearly 70 percent of long-term problems start with poor leveling or bad drainage during site preparation, based on pool manufacturer surveys from 2023. Skipping this step leads to high repair costs and shortens the life of both above-ground plunge pools and in-ground models using reinforced concrete walls or insulated forms.
Every detail counts—especially if I want easy backyard maintenance with reliable filtration systems, stable decking, and simple pool landscaping down the line.
Excavation
Excavation starts with marking your plunge pool’s exact shape and pool dimensions on the ground. I use a backhoe or a mini excavator to dig out the soil—watch for water tables, underground wires, or tree roots as you go.
Mark the dimensions of the pool
I use stakes and string to mark the outline of the plunge pool. My measuring tape helps me get exact pool dimensions. Most plunge pools come in widths of 8 feet, with lengths from 10 to 18 feet.
I can also pick different shapes; rectangles, circles, or freeform designs.
Accurate marking is key for fitting a prefabricated shell or planning concrete formwork. I double-check all corners with a carpenter’s square. The right shape and size help set up plumbing lines, filtration system placement, and proper pool equipment later on.
For custom plunge pools, clear markings make excavation simple and safe.
Use appropriate equipment to dig the hole
After I mark the pool dimensions, I grab the right equipment for digging. For small plunge pools, shovels and wheelbarrows work well. Larger projects need tools like mini excavators or backhoes.
Renting an excavator with wet hire means a trained operator handles it; dry hire means I run it myself. If the ground is rocky, drill bits help break up tough soil.
I always match my hole depth and width to my chosen pool size, adding room for gravel bases and backfilling materials. Safety fencing goes up around the site from start to finish—this keeps kids and pets out during excavation.
The right tools save time and prevent mistakes in plunge pool installation projects of any size—no exceptions here.
Installing the Pool Base
I press down the soil first, then spread a layer of gravel or sand for water resistance. After that, I make sure everything is flat and packed firm with careful compaction—this keeps the pool base steady and stops heat loss from below.
Compact the soil and add a gravel or sand base
I compact the soil first to prevent settling or shifting in my plunge pool installation. I use a hand tamper for small spaces; for bigger areas, I rent compaction equipment like plate compactors.
The ground must feel solid and hard before adding pool materials or setting up DIY plunge pool kits.
I add a 10 cm, or 4-inch, layer of gravel or sand next to create a stable base. Gravel helps with drainage and keeps water from pooling under the pool structure. Sand works well for smooth leveling if my backyard landscaping needs it.
This step supports proper pool depth and avoids future problems with water features or filtration systems shifting out of place. The right preparation here means better pool safety and easier long-term pool maintenance.
Ensure the base is level and stable
I use a spirit level to check the gravel or sand base. The bubble must stay between the lines, so I know my plunge pool sits flat. Any high spots or dips get fixed right away with a shovel or rake.
A level and stable base keeps my in-ground plunge pool looking even and prevents cracks later.
Pool manufacturers say this step protects against future problems like shifting walls or leaks. Uneven ground can harm water features, plumbing systems, and even pool equipment such as skimmers and heaters.
For best results, I lay down 4 to 6 inches of compacted gravel before checking for level again. This makes sure my custom plunge pool stays safe and strong over time.
Pool Placement and Structure
I set my insulated concrete form pool into position, checking the fit along each edge. Rebar reinforcement keeps the structure steady and helps protect against corrosion—ready for strong backyard use.
Place a pre-molded pool or construct walls for concrete pools
I lower the fiberglass plunge pool shell into the hole. Fiberglass pools come pre-molded from manufacturers like Leisure Pools or Barrier Reef, and they are common for DIY installs.
I check that the shell fits tight to my marked pool dimensions, which may be 10 by 6 feet for smaller backyards. Following the manufacturer’s guide keeps my warranty valid.
For a concrete custom plunge pool, I set up forms to match my chosen shape—rectangle or freeform shapes both work. Insulating concrete forms and steel rebar support strong walls that resist water pressure and corrosion, especially in saltwater pools.
Careful placement of panels plus grouting at joints keeps water inside, protecting against leaks. After this step, plumbing gets installed next for proper circulation and filtration system setup.
Secure the structure with rebar reinforcement if needed
Steel rebar in a grid pattern boosts the strength of any concrete or masonry plunge pool. I use rebar chairs to lift those rods before pouring concrete, making sure each piece stays exactly where it should.
This method helps prevent wall cracking and stops structural failure from heavy water loads or ground pressure.
For my diy plunge pool project, I place bars at 12-inch intervals in both directions to meet standard pool construction codes. With this approach, my custom plunge pool lasts longer, resists shifting soil, and protects against corrosion if paired with sacrificial anodes or coated steel.
Rebar reinforcement is key for solid backyard pools—whether building an above-ground plunge pool or digging an in-ground one with serious depth and dimensions.
Plumbing and Filtration Setup
Now it’s time to set up the pipes, pool skimmer, and install your filtration system—this keeps water clean and clear. Make sure all pumps, filters, and heaters fit snugly into place so you get reliable flow and easy maintenance…
check that wiring stays dry for safety.
Install the plumbing system for water circulation and filtration
I use PVC pipes because they last long and are easy to join. I fit drains, skimmers, and return jets first. Skimmers help keep out leaves and dirt. Drains go at the lowest pool point for full water flow.
I put return jets where clean water flows back into the pool.
For extra features, I can add spa or resistance jets for a stronger swim or more comfort. I connect everything to pumps and filters right after placing them—these clear dirty water fast.
With every joint sealed tight, leaks stay away. For most plunge pools under 15 feet wide, one main drain and two returns work well. Keeping proper filtration in mind cuts down on pool maintenance later.
Connect necessary equipment like pumps and filters
I connect the filtration system first. I choose energy-efficient, variable-speed pumps to save up to 80% on energy bills. Pumps and filters work together; they move water and keep it clean by removing dirt and small particles.
Pool chemicals like chlorine or bromine go into the filter to help me maintain the right water ph levels.
A licensed electrician must complete all electrical work for pool equipment, including heaters. This step prevents electrocution risks and meets local zoning laws. Popular pump brands include Hayward, Pentair, and Intex.
Filtration units come in three main types: sand, cartridge, or diatomaceous earth models—all designed for clear water quality year-round.
Next comes backfilling around the plunge pool with soil or gravel for support and landscaping use.
Backfilling and Landscaping
I use soil and gravel to fill in the space beside the plunge pool, keeping everything steady. Next, I add pool covers or simple backyard landscaping—plants, pavers, or mulch—to finish the area around my custom setup.
Backfill around the pool with soil or gravel
I fill gaps around my plunge pool with soil or gravel. This step gives strong support to the pool shell. Proper backfilling keeps the in-ground plunge pool from shifting or sinking over time.
I use compacted gravel for better drainage, which helps prevent water buildup near the pool walls.
Pool maintenance becomes easier when I choose gravel because rainwater drains away fast. Soil works too but may hold more moisture, so I check that it packs tightly against the structure.
Pool depth stays even and safe if I do this step right. Using these materials lessens future repairs and supports deck or landscaping projects later on.
Add finishing touches like decking or plants
So after backfilling with soil or gravel, I pick strong decking. Wood, composite boards, concrete slabs, and stone tiles each offer a unique look for pool landscaping. I use wood decks if I want warmth, but go for concrete to match modern homes.
Composite lasts longer in wet areas and resists rot from water treatment.
To brighten my plunge pool area at night, I add LED underwater lights or recessed deck lights; solar fixtures cut energy costs. For privacy and a soft feel underfoot, planters filled with ferns or low-maintenance shrubs work best.
Plants also help control humidity near the water’s edge—this helps prevent slippery moss on decks and keeps ph levels steady around the filtration system.
I choose plants that thrive by pools: palms give shade while grasses stay green all summer. Easy lighting options keep outdoor spaces safe after dark. Using stones along borders blocks weeds from corroding root systems of nearby plants.
Finishing touches like decking improve safety by reducing slips near the plunge pool’s edge; plants boost well-being by bringing fresh air into my backyard environment every day of the year.
Conclusion
Building a plunge pool at home works. I can follow these 8 clear steps for great results. Good planning, the right pool materials, and careful use of tools like levels and shovels keep the install smooth.
My new pool will fit my space, style, and budget—just measure twice and dig once. This hands-on project provides real value with cool dips just steps away from my door.
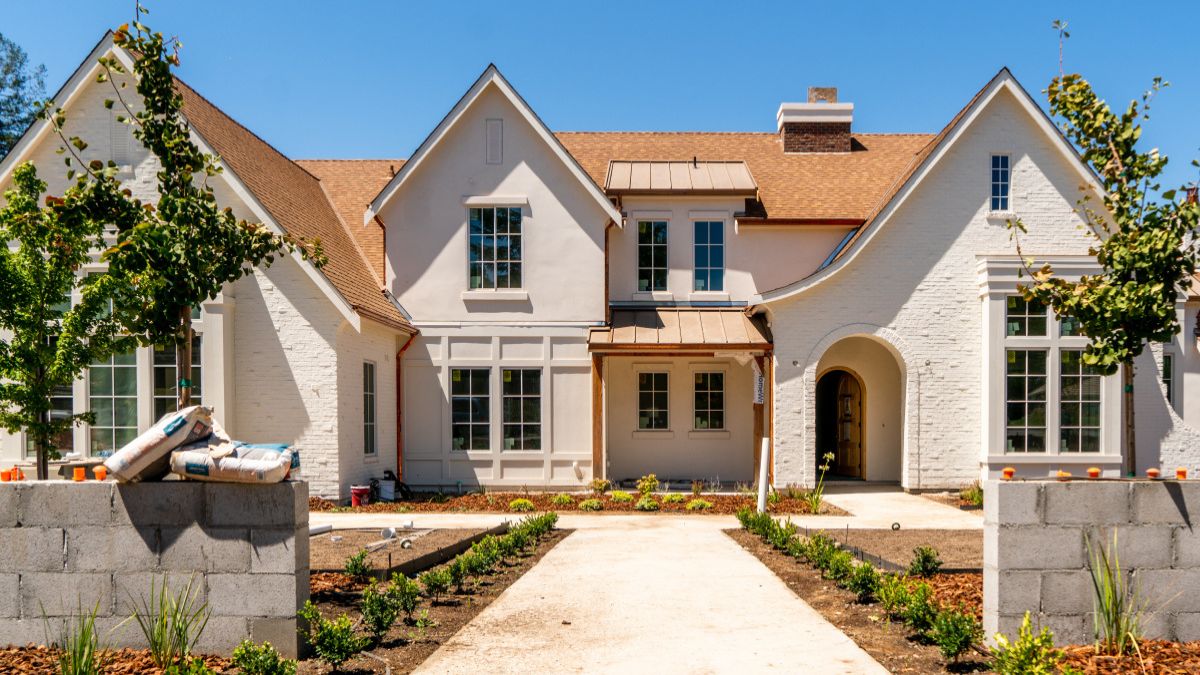
Building a home is one of the most significant investments anyone can make, and the choice between constructing on your own lot versus buying a pre-built property often shapes the outcome of that decision. While a pre-built house may offer immediate convenience, it often comes with compromises in design, layout, and location. On the other hand, choosing to build a home on your lot allows for complete control, long-term satisfaction, and a deeper sense of personal connection to the space.
We will explore why this option can redefine homeownership and provide benefits that extend well beyond the first move-in day. Choosing to build on your lot in Orlando opens opportunities for customization and location choice while also considering financial benefits and long-term lifestyle needs. This path is about creating a space that is truly yours. Thoughtful planning allows for individuality, long-term comfort, and investment value that pre-built homes often cannot fully match.
Key Reasons to Build a Home on Your Lot
Customization That Matches Your Lifestyle
When you build a home on your lot, you are not limited by the cookie-cutter designs often seen in pre-built properties. Instead, you can tailor every detail to align with your lifestyle, preferences, and future plans. Whether it is the size of the living room, the layout of the kitchen, or the inclusion of a home office or gym, you can design the home to serve your exact needs. Families can create multi-generational layouts with in-law suites, while individuals may focus on unique features like expansive windows or eco-friendly designs. Unlike buying a pre-built home, where you must adapt to an existing structure, building on your lot lets the structure adapt to you. This level of customization ensures the home reflects your personality and daily routines, creating a space that enhances comfort and satisfaction in ways pre-built houses simply cannot.
Full Control Over Location and Land Use
A major advantage of building on your own lot is the ability to choose precisely where your home will stand and how the land will be used. Pre-built houses often leave buyers stuck with lots that may not fully meet their desires, such as proximity to schools, noise levels from nearby roads, or awkward slopes and layouts. Building on your lot provides the opportunity to evaluate the land in advance, plan landscaping, and decide on the orientation of the home to maximize natural light or privacy. It allows you to establish outdoor spaces such as gardens, patios, or play areas exactly how you envision them. This level of control ensures your surroundings feel intentional and harmonious rather than an afterthought, giving you both functional and aesthetic benefits that are often limited in pre-built developments.
Better Long-Term Investment Value
While building on your lot may seem more expensive upfront than purchasing a pre-built home, the long-term value often outweighs the initial cost. Homes built to your specifications are generally newer, equipped with modern materials, and designed for energy efficiency. This means fewer repairs, reduced utility bills, and a stronger resale value when the time comes. Buyers in the future often see more appeal in homes that stand out with unique features and modern construction standards. Additionally, the value of owning both the land and a custom-built home can compound over time, providing financial stability. Pre-built homes may initially cost less, but many come with hidden expenses such as outdated systems or the need for significant renovations. Building on your lot is not just about immediate gratification but about securing a home that holds its value well into the future.
Opportunity to Integrate Modern Technology and Efficiency
Building on your lot allows you to incorporate the latest technology and sustainable design practices into your home from the very beginning. Pre-built homes, especially older ones, often lack the infrastructure to support advanced systems without costly upgrades. When constructing a new home, you can integrate energy-efficient windows, solar panels, smart home systems, and advanced insulation materials. These additions not only enhance comfort but also contribute to long-term savings and environmental responsibility. Additionally, designing your home with modern efficiency in mind can make daily life more convenient, with systems that are tailored to your lifestyle rather than retrofitted later. This approach ensures that your home remains relevant to evolving technology, providing a forward-thinking living space that aligns with both current and future expectations.
A Deeper Emotional Connection to Your Home
One of the most overlooked yet powerful reasons to build a home on your lot is the emotional connection it creates. Being involved in the planning, design, and construction process fosters a sense of ownership and pride that pre-built homes rarely provide. You witness your vision come to life from the ground up, and every room carries a story of intentional choices. For many, this process makes the home feel more personal, transforming it from just a place to live into a true sanctuary. The memories created while building the home, from selecting finishes to walking through the site during construction, enhance the attachment you feel once you move in. Unlike buying a pre-built property where someone else’s choices dominate, building on your lot ensures that your home is uniquely yours, both practically and emotionally.
Building a home on your lot instead of purchasing a pre-built property is a decision that extends beyond immediate convenience. It is about embracing the opportunity to create a home that fully represents your lifestyle, values, and vision for the future. From customization and location control to long-term investment and emotional connection, this path ensures that your home is not just functional but meaningful. Pre-built houses may offer speed and simplicity, but they often come with compromises and hidden costs that building on your lot can avoid. Ultimately, constructing a home on your lot gives you more than just a place to live—it offers the chance to build a foundation that reflects who you are and supports the life you want to create for years to come.
-

 TECHNOLOGY10 months ago
Top 10 Must-Read Stories from Kristen Archives You Can’t Miss
-

 TECHNOLOGY1 year ago
Sky Bri Net Worth Revealed: How She Built Her Financial Empire
-

 TOPIC1 year ago
Basement Renovation Contractors: How They Tackle Structural Issues During Renovations
-

 TOPIC1 year ago
5 Reasons the //Vital-Mag.Net Blog Dominates Lifestyle
-

 BEAUTY1 year ago
Revitalize Your Hair with Oribe Hair Care for Damaged Hair: Style It with Blue Dresses for Weddings and Events
-

 TOPIC11 months ago
Top 10 Articles from the ://Vital-Mag.net Blog That You Can’t Miss
-

 CRYPTO1 year ago
Crypto30x.com Review: Is It the Right Platform for You?
-

 BUSINESS10 months ago
TraceLoans Explained What You Need to Know